Ingredients
- Lots of good quality dark chocolate candy melts or chopped dark chocolate bars (such as Ghirardelli)
For the filling:
- 5 oz. dark chocolate, melted
- 5 oz. Greek cream cheese (or Neufchatel)
- 2/3 cup creamy peanut butter
- 2 teaspoons real vanilla extract
Instructions
- Microwave a small bowl half full of dark chocolate for 1 minute and stir a lot. If you can’t “stir away” pretty much all of the chocolate bits and make a smooth chocolate, microwave another 30 seconds and stir again. (Repeat if needed.) If the lumps are mostly gone, spoon a little bit of the chocolate into each spot of a flexible candy mold and tap on the counter to release any bubbles.
- Use a new paintbrush to “paint” the chocolate up the sides of the mold. Set in the refrigerator to chill for about 15 minutes. Check the sides of the mold … are any spots showing? if so, paint the sides a little more with melted chocolate and set back in the fridge until the chocolate is set.
- Meanwhile, put the chocolate in a small mixing bowl and microwave for 1 minute. Stir well. Add the cream cheese and microwave another 30 seconds. Stir really well, until all the white from the cream cheese is gone. Stir in the vanilla and the peanut butter.
- When the chocolate in the mold is set, using a tiny cocktail or baby spoon, fill each hole most of the way with the filling, smoothing with your fingers or the spoon. Set in the freezer for about 15 minutes to cool the filling.
- Once the filling is hardened, smooth it a little more, then melt some more chocolate and pour over the top, using your paintbrush to ensure you completely cover the filling. Tap the mold on the counter several times to smooth the chocolate, then set in the fridge to set the chocolate.
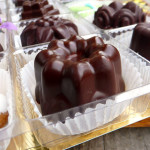
- Once the chocolate is set, remove the truffles from the mold by gently pushing up from the bottom. The mold should flip up, releasing the beautiful truffles.
Notes
The amount of dark chocolate you use to “coat” the truffle molds depends on your technique. I used most of a 30-oz. bag of dark chocolate before I was done making truffles. You don’t need to make these all at once–you can refrigerate the filling in an airtight container and make more truffles as needed. It will keep for several weeks.
RECIPE SOURCE: http://www.sumptuousspoonfuls.com/
© Copyright 2016, Sumptuous Spoonfuls. All images & content are copyright protected. I love it when you share, but please do not use my images on your own site/page without prior permission. If you want to publish any of my images, please ask first. Sharing, pinning, and tweeting is always appreciated as long as the shares and pins link back to here for the recipe. If you want to republish this recipe as your own, please re-write the recipe in your own words or link back to this post for the recipe.
