
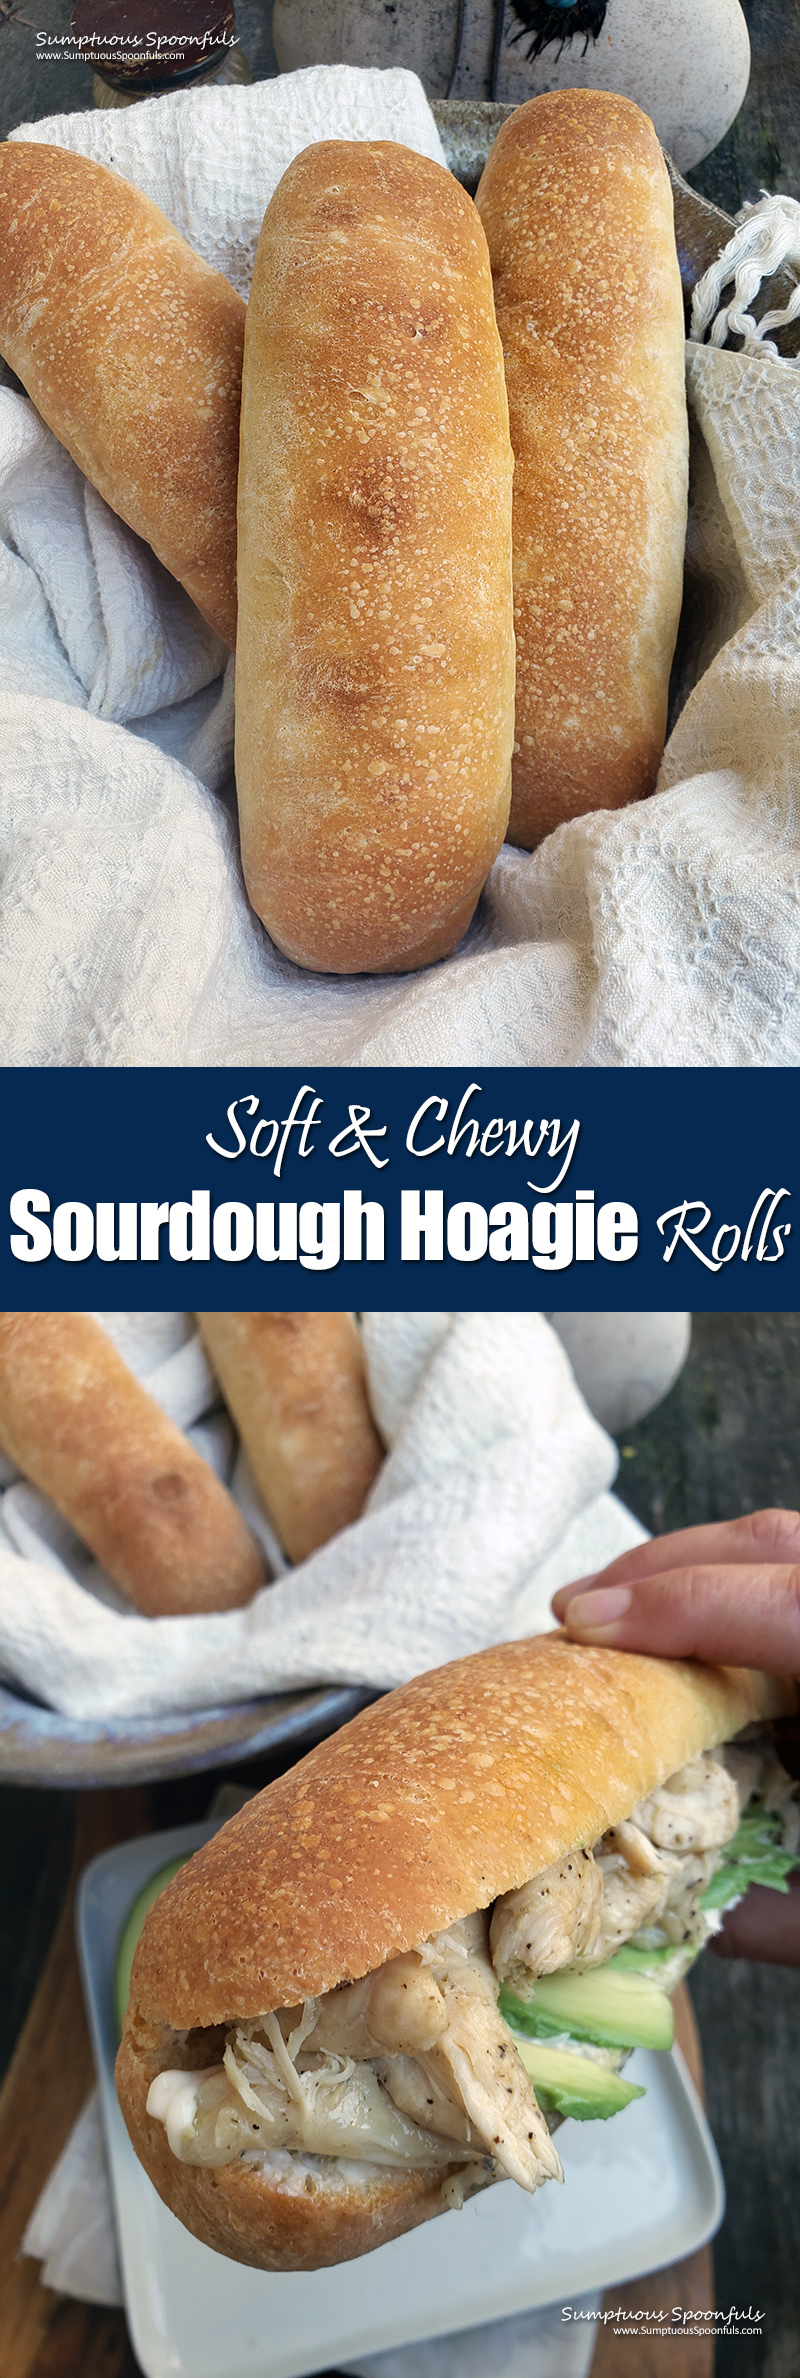
Soft and tender on the inside with a little chew to the crust and a great texture, these beautiful sourdough hoagie rolls are the perfect vessel for your favorite sandwich. I personally like to add a little bit of yeast to keep them from getting too sour and to help them rise faster, but if you’re a sourdough purist, you can simply wait longer for your dough to rise.
But hey, if you’re not someone who wants to wait until tomorrow, you can have fresh, hot, homemade sourdough rolls for your sandwiches, just add a little active dry yeast and it’ll all happen much faster. (You will still need time for the dough to rise … allow for about 3 – 5 hours total time.)
What are hoagie rolls?
“Hoagie” isn’t a common word most of us use, but basically, a hoagie roll is a long, thin, serving-size loaf of bread made specifically for sandwiches. Sandwich places like Jimmy John’s and Jersey Mike’s use their own version of hoagie rolls for their signature sandwiches.
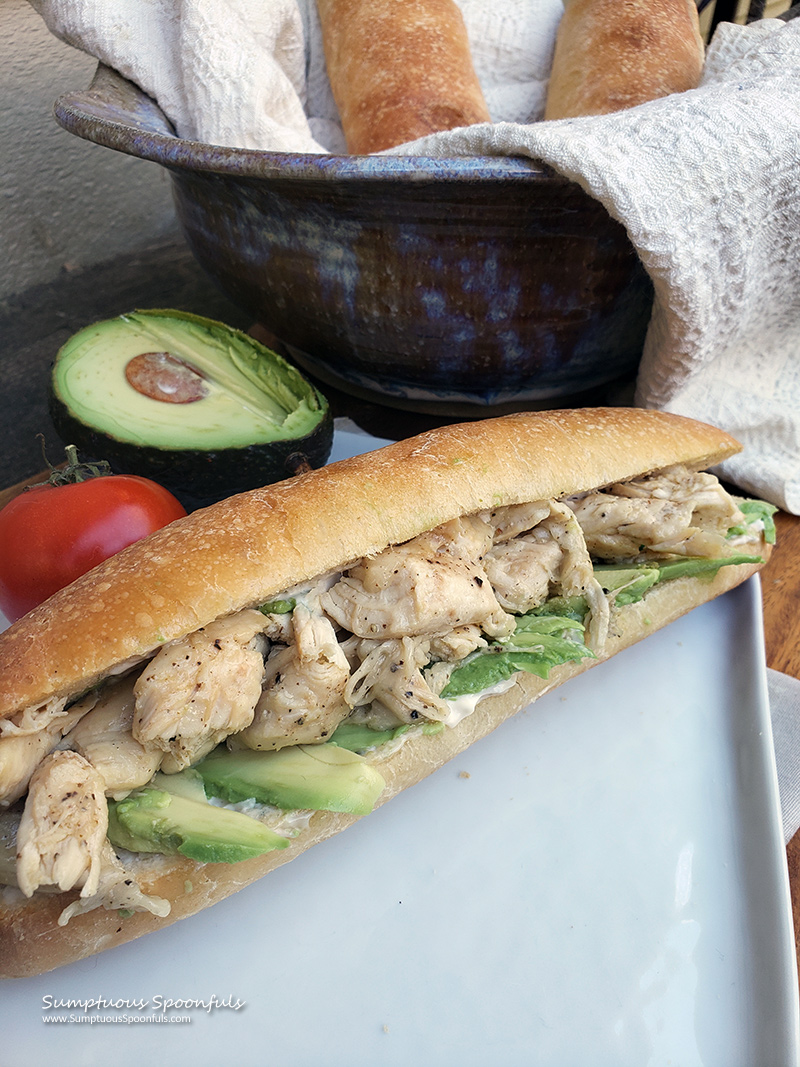
After my kids went out with their dad to a local restaurant, my son came home and requested I make hoagie rolls. At the restaurant, he ordered a chicken avocado sandwich, which he said was delicious, but he was disappointed in the restaurant’s choice of bread. He felt that he could make it better at home if he just had a good hoagie roll.
When faced with the challenge of making a worthy hoagie roll for my boy, I googled some recipes and found this one from The Kitchen Whisperer, which she proclaimed were the BEST soft and chewy hoagie rolls. They certainly looked beautiful, but they weren’t sourdough. But hey, that doesn’t deter me. I know how to adapt a regular recipe to bring in the goodness of fermentation … and so, I did.
How good are these sourdough hoagie rolls?
My son tells me these rolls are the BEST bread I’ve ever baked, which is a pretty huge compliment, considering our other bread favorites like the Crusty French Rolls, Soft & Fluffy Do-Ahead Dinner Rolls, Sweet Buttery Sourdough Crescent Rolls, Hawaiian Rolls, Sourdough Brioche Burger Buns … and the list goes on … if it involves bread, we’ve tried it and reveled in it. (Lately more THEM than me, but I still LOVE baking bread and I’m grateful that they are here to eat it!)
The other young adult in the house refrained from infringing on her brother’s “bread territory” for quite a while, but finally she tried one and said “that’s some really good f#%k-in bread” … um yeah, there are sometimes swear words in my house to describe bread and other really really good food-type things. (I hope you are not offended!)
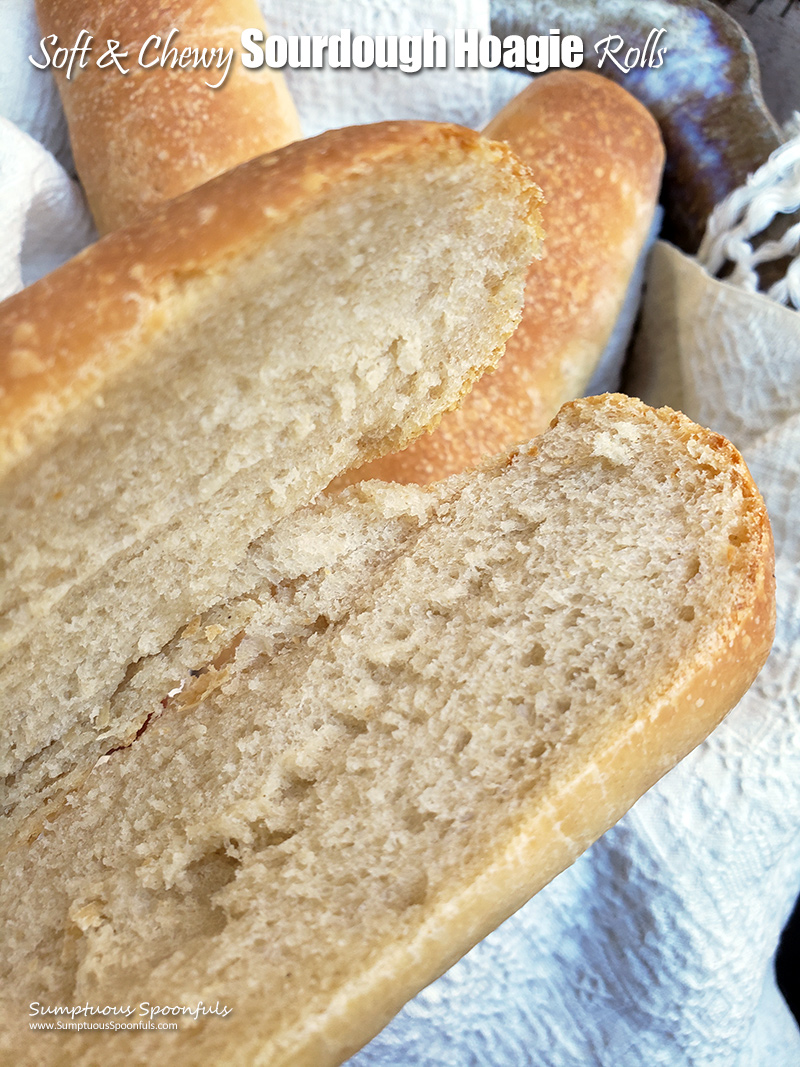
I took this picture just to show you how lovely the INSIDE of these rolls are. No big holes here … yes, sometimes you want big holes, but when you’re making a hoagie (a.k.a., submarine sandwich), you want little holes, a nice soft texture inside and a slightly chewy crust.
How do these hoagie rolls stand up to a sandwich?
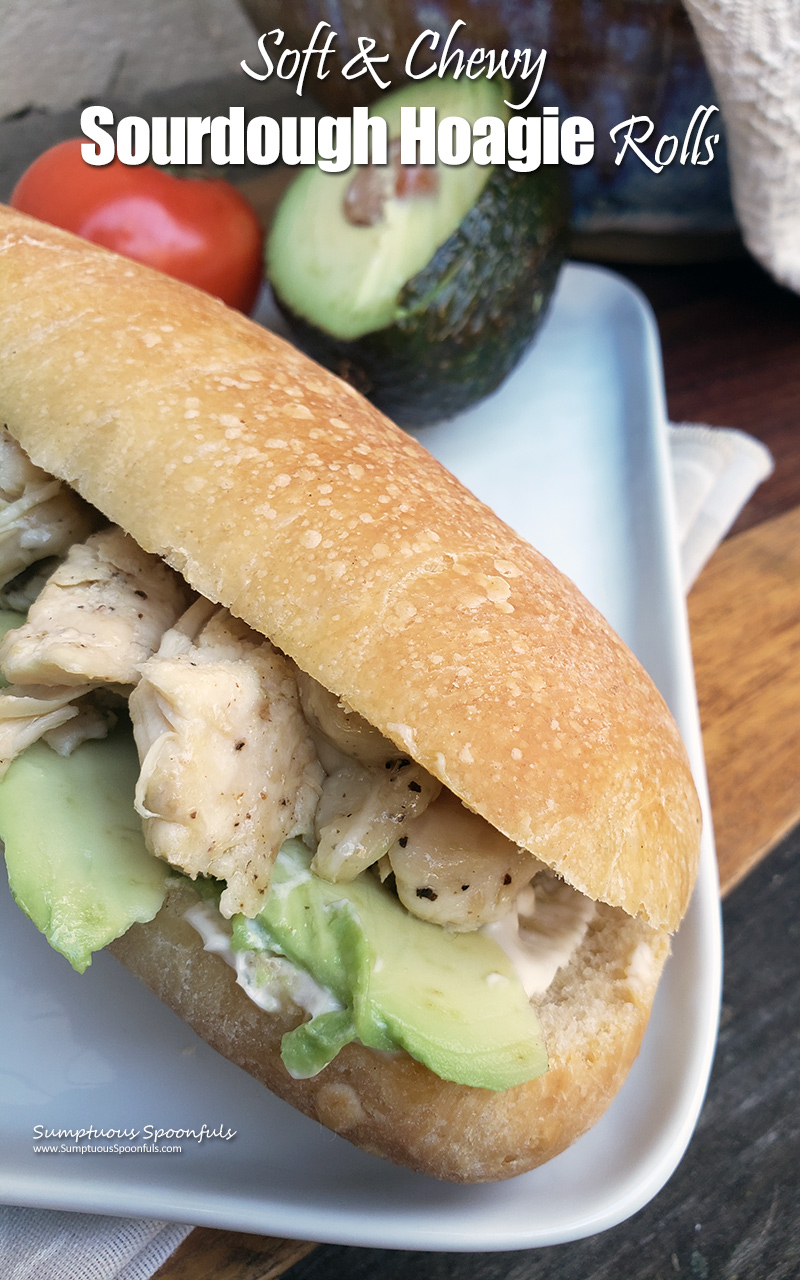
You are going to find these sourdough hoagie rolls have a nice sturdy crust that are absolutely SUPERB for sandwiches! If you take care not to cut all the way through, you can stuff your hoagie with all kinds of sandwich goodness, then pick it up and bite into it without worrying that it will fall apart on you.

My son made his hoagie roll into a chicken avocado sandwich with pesto mayo and melty swiss cheese. Personally I would have added some onion and tomato and maybe even some roasted peppers, but that’s not his style. As a mom, I’m just thrilled he’s learned to love avocado. Also, I’m super proud that he cooked his own chicken and mixed up the pesto mayo himself. And, you guys! I’m SUPER super extra proud that he’s just landed his first post-college professional position, We have just passed a gargantuan milestone in my home and we are SO so happy.
What kitchen tools/equipment should I use?
I found my stand mixer came in super helpful for mixing and kneading the dough, but you don’t necessarily NEED a fancy stand mixer. You can definitely knead the dough by hand, although you should knead for longer if hand kneading. My sister gave me her old stand mixer. Thanks, sis!) In the past, I’ve also used bread machines to mix up the dough, so you can go that route as well.
I was also super glad I had a french roll pan (or baguette pan). With holes on the bottom and rounded bottoms for baguettes or rolls, I definitely recommend you use this specialty pan to achieve the perfectly shaped rolls without the tricky “slash” (which I find a little tricky to master). I like that the pan makes my rolls just right for sandwiches, as opposed to baking them on a flat surface where they tend to spread and flatten. What I love about baguette pans is they don’t cost much and they make a HUGE difference in the outcome!
I can’t help but think that these delightful hoagie rolls would be so PERFECT for my epic Vietnamese Pork Banh Mi sandwiches. It’s been a loong long time since I’ve made those … I’m thinking perhaps I should try making a chicken version sometime soon. But that, my friends, is for another day. Today, I’m simply happy that I’ve mastered one more sourdough recipe that my kids love.
Recipe adapted from The Kitchen Whisperer
Print
Soft & Chewy Sourdough Hoagie Rolls
Description
Wonderful homemade hoagie rolls that are soft on the inside with a nice chewy crust and the healthy goodness of sourdough, made simpler with a stand mixer (or bread machine) and french roll pan. I like to add a bit of active dry yeast to make it less sour and MUCH faster.
Ingredients
- 1 1/4 cups water (296 g, 10.43 oz by weight)
- 2 – 4 oz. sourdough starter (from the fridge or discard is fine, 57 – 113 g)
- 2 Tablespoons sugar
- 1 teaspoon salt
- 1 teaspoon active dry yeast
- 3 1/2 – 4 cups bread flour (507 g, 17.9 oz by weight)
- 4 Tablespoons grass-fed butter, slightly softened (can substitute olive oil to keep it vegan) (57 g or 2 oz. by weight)
Instructions
- Put the ingredients into your stand mixer bowl (starting with 3 1/2 cups flour) and give them a quick stir to make a very shaggy dough. Using the dough hook, mix/knead for about 5 minutes, adding bits of extra flour as needed to keep the dough from sticking to the bowl.
- Meanwhile, set the oven to “proof” setting (or warm it to the lowest temp and turn the oven light on, then turn off the oven). When the dough is soft and pliable, remove it from the bowl, add a little drizzle of olive oil to the bottom, then put the dough back in and roll it around to coat it in oil. Let it proof in the oven for 1 – 2 hours, until it’s doubled in size.
- Cut the dough into 6 roughly-equal pieces (I cut in half, then cut each half in thirds.) Shape the hoagies by flattening each piece with your hands, then roll it up, jelly-roll style, pulling the dough towards you to push out the air bubbles.
- Once you’ve completed all six rolls, then take each roll and roll it the other way. To do that, rotate it so it’s pointing away from you, then roll it up from the end nearest you to the end pointing away from you. This will essentially make it into a log shape again. Repeat this process 2 – 4 times, letting the rolls rest, covered, a couple minutes between each session. This builds tension in the dough and releases the air bubbles.
- Next, take a roll, and working from one end to the other, take your thumb on the side facing you and 2nd/3rd fingers on the side facing away from you. Grab onto the bottom edge with your 2nd/3rd fingers and gently pull the dough upwards and over, towards you and then use your thumb to pull the dough upward from the bottom to the top away from you. So you’re kind of pulling the dough from the bottom up and over and making the roll longer and thinner in the process. Move from left to right, repeating this action, until the roll is thin and looks like a fully-cooked puffy breadstick.
- Set the dough with the pinched side up on your oiled pan, then flip so the pinched side is down and the top is nicely oiled. Repeat with the other five rolls. Let rise, covered, in a warm oven for another 45 minutes or so or until almost doubled in size and looking close to the right size for a sandwich. If you’re feeling brave, slash with an oiled bread lam before baking.
- Bake at 375 F. for 15 – 25 minutes or until golden brown on the top AND the bottom. Check at 15 minutes and if they are getting too brown on top, cover with foil. Once they are browned on both sides and not squishy when poked on the side, they are done. Let cool on a rack a bit before cutting and enjoy.
Notes
If using a bread machine, use the “dough” setting in place of step 1 and 2. If hand kneading, knead for 8 minutes.
If you don’t want all six rolls right away, you can do initial shaping, then put the rolls in a covered container in the fridge. When you’re ready to cook your rolls, pull them out of the fridge and let the dough warm for about an hour. Oil your pan and set the shaped buns on there. Do a little pinching on the bottom to lengthen and thin the rolls to about breadstick size, then flip, cover and let rise until the buns are good and puffy, but not overflowing the edges of the pan and bake.
© Copyright 2021, Sumptuous Spoonfuls. All images & content are copyright protected. I love it when you share, but please do not use my images on your own site/page without prior permission. If you want to publish any of my images, please ask first. Sharing, pinning, and tweeting is always appreciated as long as the shares and pins link back to here for the recipe. If you want to republish this recipe as your own, please re-write the recipe in your own words or link back to this post for the recipe.
50 comments
Beautiful rolls, Ann! I can’t wait to make them!
Such beautiful rolls! I love sourdough and will be adding this recipe to my must-make file.
Making these now and so far so good! Such an easy same day recipe and another great way to us up some of my discard!
I’m a bit confused about #4 instruction. Are you saying to flatten each roll then jelly roll again 3-4 times? And could you explain what you mean by pinching it up toward you? Thanks
Hello Jeri,
I revised step #4 (and split it into two steps) to try to make my description more clear, but in the end, I’ve been thinking the best way to describe it is to show it in a video. I’m trying to figure out a way to do that. I know, bloggers all over the world do it every day, but my kitchen is dark and I need someone else to take the video while I demonstrate … easier said than done!
I hope my new description helps! In the meantime, I’ll be sitting here wishing I could find a better way to SHOW you how.
Take care and good luck with the buns,
Ann
Great recipe! I used instant yeast and baked them on a cookie sheet and they turned out just fine. They are a bit bigger than I anticipated, so next time I’ll probably shape them smaller.
So glad you had great results, Ashley! I make my hoagie rolls big because my son is big and tall and in his 20s. He has a big appetite! For smaller appetites, you would probably want to make them smaller or cut them in half.
Any luck on the video? I really would love to attempt this recipe but the instructions are a bit confusing.
I’m sorry, Sarah. I haven’t had any luck yet, but I will let you know when I do!
Just make sure you get the air bubbles out in step 3, pinch the seams and skip steps 4 and 5.
They still turn out great, without a complicated shaping process (I couldn’t figure it out either lol).
Excellent rolls, thank you for the recipe!
It’s really not as complicated as it sounds! I just need someone to hold the camera so I can SHOW you guys how I do this. You’re right, though, Robert. All we’re doing is minimizing air bubbles and building some tension in the dough, so it really doesn’t matter HOW you do that. There are lots of methods out there. I was just attempting to describe (not so well, I admit) how I do it.
Nice and easy recipe, really yummy slightly sour taste! They rose really well and had a soft texture. I cheated and used the bread machine to knead&first rise, and I had to add an extra 1/2 cup-ish of flour. I also had to heavily floured my work surface to shape the buns. Worked beautifully for meatball sandwiches and I will be using this recipe again!
Hi Kimber,
It sounds like you love them as much as we do! I’m so happy the recipe worked well for you. Thanks so much for taking time to leave a review. 🙂
Ann
Do you have a by weight version of this recipe?
Hi Lelsie,
Just for you, I added weights to most of the recipe ingredients. Hope it helps!
Ann
These rolls were excellent, the first batch was made with bread flour and the second batch as made with all purpose (just to see, plus I was out of the bread flour)
Hi Sarah S. Hope your still around. You told us you did one with bread flour and one batch with all purpose flour. But you failed to tell us the results! Did they basically come out the same??
So glad I found this recipe! This will be my go-to for buns/hoagie rolls. I was actually looking for a recipe for hamburger buns that didn’t crumble or fall apart, or end up a soggy mess. I like to pack my burgers with lots of fixin’s. I’m not an expert baker but I have a pretty good amount of experience. The shaping directions were difficult to understand, but I understood why so I used my
own technique to shape into buns. They tasted absolutely delicious and I absolutely stayed together after loading my burgers. Thank you for the recipe!
Thank you for your kind comment, Krista! I’m so excited they turned out well for you. One of these days I’ll find a way to get a video of my technique. I know it’s hard to understand because it’s hard to describe, but it’s really quite easy to do! I’m glad you have your own technique. 🙂
How can you make these with no commercial yeast? Can you use active starter and more of it?
Hello Kaylie,
Without the commercial yeast, you simply increase the rise time for both the first rise and the second. You might want to do an overnight rise for the first one.
The result will taste more sour, but should still be delicious!
Best of luck,
Ann
These are so good! I’ve now made them a couple times and don’t really want to eat any sandwiches without a fresh baked batch of these. So easy to make. Thanks!!
Hi Brianna,
I’m so happy they turned out well for you! I can definitely relate to wanting a fresh hoagie roll for your sandwiches. Once you’ve tasted them, you’re spoiled forever!
Ann
Hi Ann. I’ve seen roll recipes that say to mist with water a couple times to get a brown crisp crust. Would it be ok to use that technique for these as well?? Your thoughts please.
Hi Marshall,
I’ve done the mist with water method too, and yes, I think you could definitely apply that technique here too. Although I’ve had great results without it.
Ann
These rolls are delectable! And super easy! What do you think about using milk instead of water? What else could you use this dough for?
Hello Brittany,
Thank you for the review! Milk will change the texture, but you could certainly use milk in the dough. We use this dough to make burger buns too, and have also shaped it into a loaf for sandwiches. It’s a very versatile dough.
Happy baking,
Ann
Waiting on second rise currently but I made a video of the fold method I *think you use. I can send it to you if you provide an address. I set my phone on and upside down coffee cup, camera facing down on dough so no extra hands needed. Made mine with discard, yeast, 407g bread flour and 100g wheat flour. Made 8 instead of 6 for a smaller roll. Making chicken phillys tonight with them.
Yes, I’d love to see your video, Monica! Thank you … I’ll send you an email.
~ Ann
Step 5 has me confused 😩
Hi Shanelle,
Thanks for your comment! I’ve had the same question from another reader. My method is adapted from The Kitchen Whisperer’s method and as you can tell I had a bit of trouble describing it, so you can always refer to her post for help. She does provide some photos of her method that I think are very helpful.
What you’re trying to do is add tension to the surface of the dough by stretching it out without breaking it. The exact method you use isn’t as important as the simple act of adding tension. I know it might sound complicated, but once you have done it a couple times, you will likely have your own twist to how you like to develop tension in your dough.
Good luck and happy baking!
Ann
I make this as a double batch every few months and have it for any meal as a sandwich or make it as garlic bread with pasta. Fabulous!
I’m so glad you enjoy them, Lissa! We use them for so many things here, too. 🙂
I have to tell you all a little secret! While I totally crashed and burned on, trying to roll those hoagies out and make the perfect width and length they still worked, but I’ve been using this recipe for everything now! Sourdough cinnamon rolls, sourdough, Italian herbs, and cheese bread, sourdough biscuits, and regular sourdough loaves of bread! This is my 100% go to recipe and it comes out perfect every time! Thank you so much for this recipe!
Mine are never perfect either, Angie, but they still turn out delicious! I’m so happy you love this recipe. 🙂
Ann
Instructions unclear. I’m confused about steps 3-6, would have loved to see a video or pictures of the steps. I’m not even sure how they are supposed to look before I cook them.
Thanks for your comment, Chris. I adapted this sourdough recipe from The Kitchen Whisperer, who did include lots of photos of the process. You can refer to her post for her method of shaping: https://www.thekitchenwhisperer.net/2012/07/02/super-soft-n-chewy-hoagie-rolls/ … my process is a little different, but I started from hers. And honestly, I don’t think it matters. You simply want to build some tension in the dough and form the rolls into a long log shape.
One of these days I will add process photos or possibly a video, but lately my kids have been asking for me to shape them into buns instead. You can always do that, too!
~ Ann
Delish! My husband said they are the best sandwich rolls he’s ever had. I made them exactly as written, except I rolled them up my own way for the same end result.
That makes me so happy, Kat! Thanks for taking the time to rate and comment. 🙂
[…] Ingredients for Sourdough Hoagie Rolls […]
Want to try this recipe out. Confused by the amount of starter. 2-4 ounces seems like a big range. When would use the full amount and when would I use half? The texture looks perfect.
Hi Joe,
If you want a precise amount, use 3 oz. I don’t measure my starter precisely for this recipe. I put a couple spoonfuls from my starter jar into the dough and it just works. It’s more about the amount of liquid you’re adding to the recipe than the amount of wild yeast. Sometimes my starter is more watery, and sometimes it’s less.
I find bread making is not precise. It depends on a lot of factors (including the weather/humidity in the air). If the dough gets too sticky and is sticking to the bowl or your hands, add a little more flour. The dough for these rolls should be slightly sticky and soft.
Thanks for the question!
Ann
Excellent recipe! We enjoy it for all different types of bread! Rolls, hot dog buns, breadsticks…
[…] Starter: The foundation of any sourdough recipe. If you don’t already have a starter, it’s easy to make one at home or buy from a local […]
Why the hell is there not a video for these instructions?
Hi Jennifer,
There are lots of reasons why there isn’t a video for these instructions. Because I’m not a videographer. Because I don’t have great lighting in my kitchen and I don’t have a way of setting up a camera to video myself. But probably the biggest reason is I’m camera shy. That said, here’s a good video from Ethan Shlebowski for shaping hoagie rolls: https://www.youtube.com/watch?v=rR8oA5ACqPg Go to 7:50 and watch that section of his video.
Happy baking!
Ann
Oh boy, this recipe is very confusing. Hows that video coming? Is there any chance we could get an estimated time for the recipe as well?
You are going to have to show, step by step, how to form those rolls… I totally lost you.
Hi Keith,
You’re not the first person who has told me that! I’m definitely giving it some thought of how to do just that.
Thanks,
Ann
I cannot understand step 5. Is there a name for the technique you’re using so that I can just google it? This recipe has become so frustrating in my attempt to decipher what is supposed to be done.
I have ready your comments regarding being camera shy, not having a way to record, etc. I would suggest using your phone and leaning it up against something or being creative with your setup. Your face doesn’t need to be in it, we just need to see your hands and the rolls! You can even turn your flash on for recording for low light. Please, please help us out here!